Income
Service
Expand the menu option “Income”, from the Sub menu select “Service”. Your screen should now look like this:
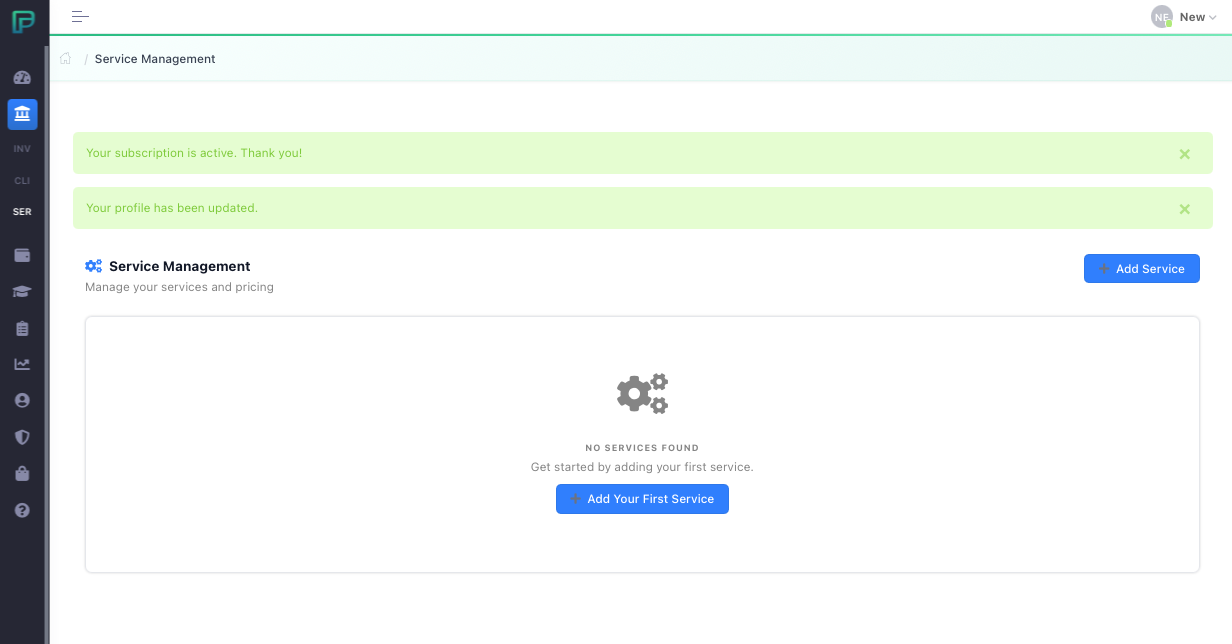
The “Service” menu is where we set up our chargeable services, such as individual counselling session, couple counselling session, discount rate or standard rate, the choice is down to how you bill for your services. Select “Add Service” and start to create your chargeable services.
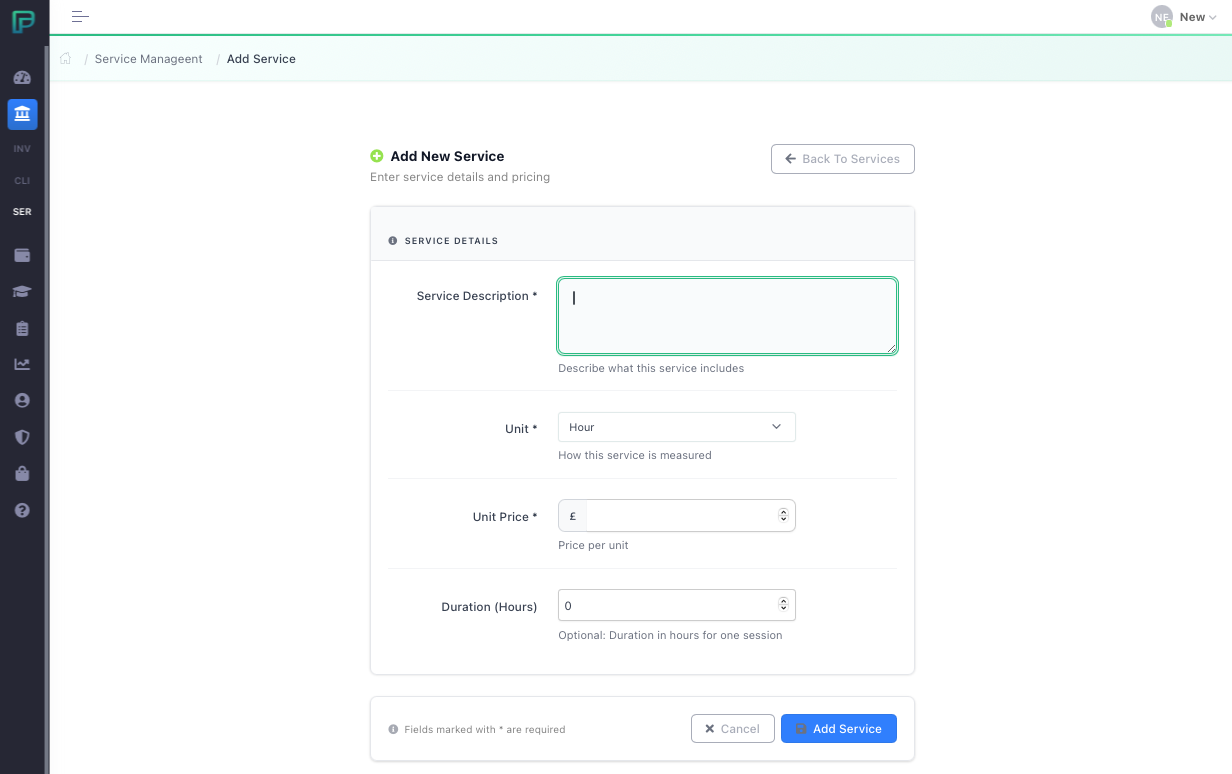
After clicking ‘Save’ you will be taken to the list of services, you can create as many as you like here, but it’s probably best to keep it simple. When you later come to create invoices this whole list of services will be presented to you, the fewer services you have, the quicker it will be to select the one you are looking for.
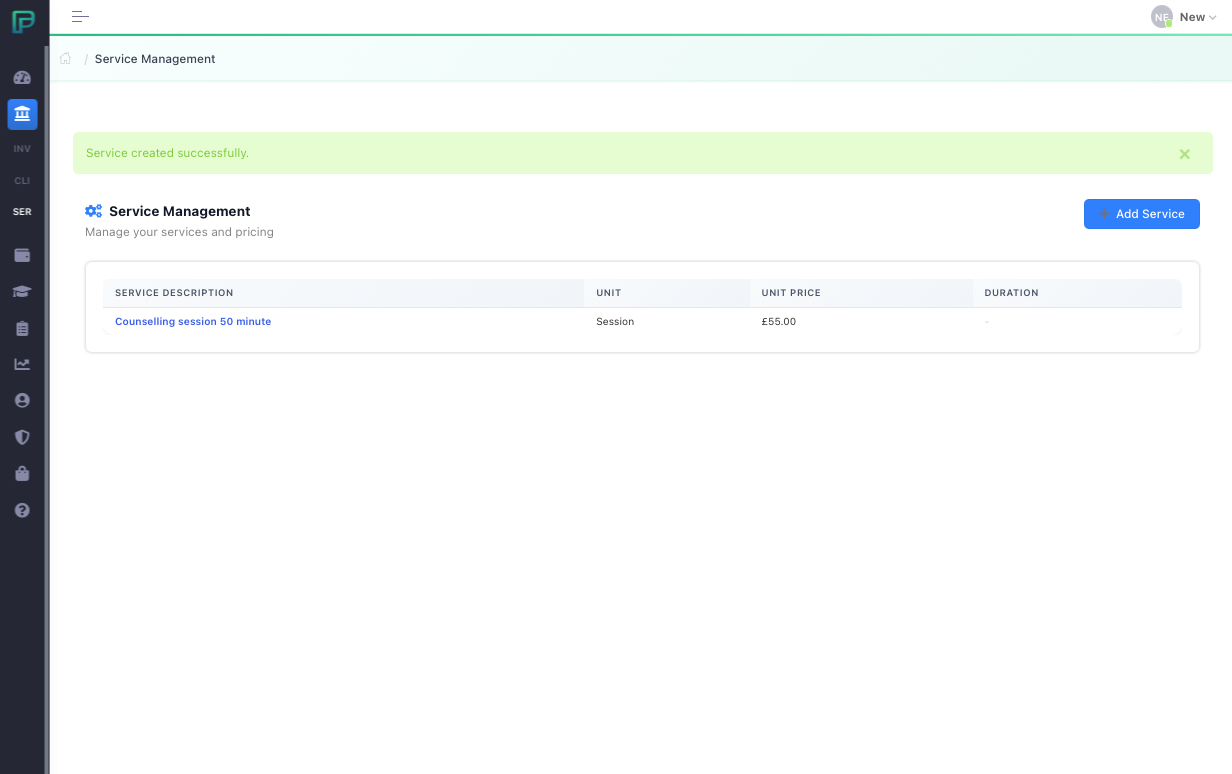
You can amend or add services from this page.
Client
Once we have setup our services, we can begin to add our clients. From the main menu, under the Income section, select the “Client” option.
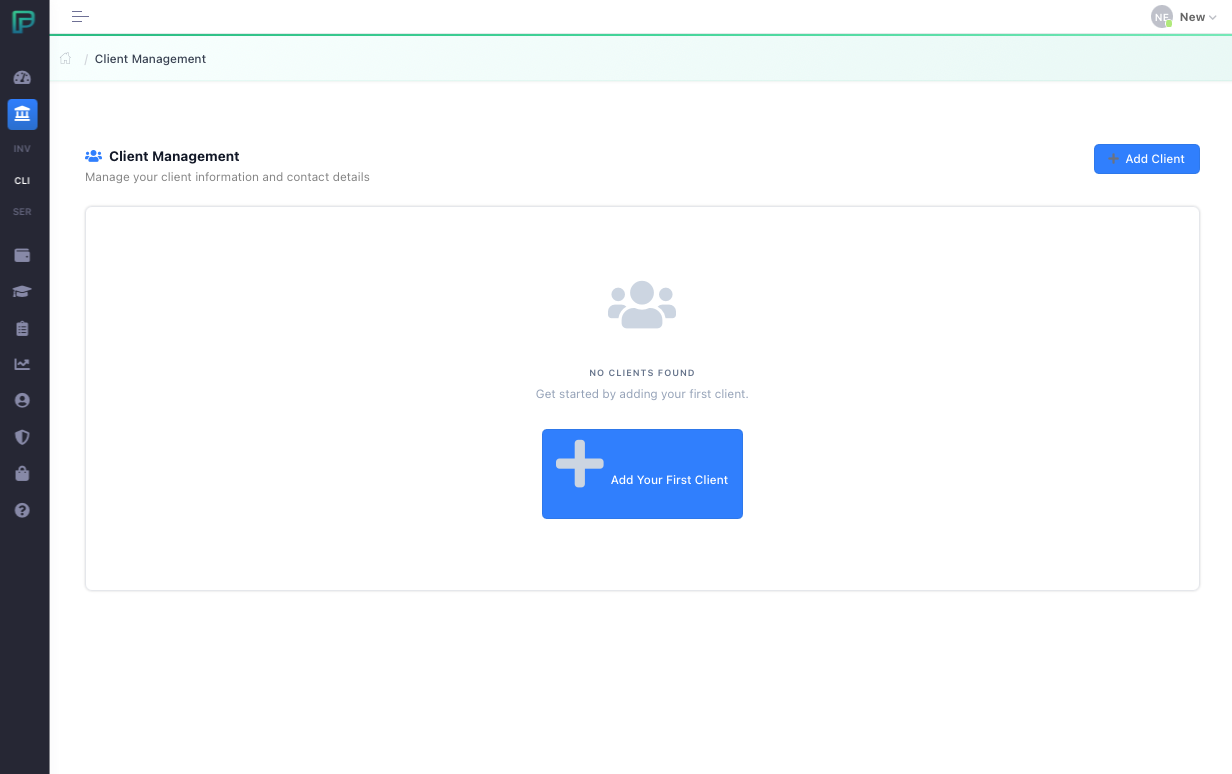
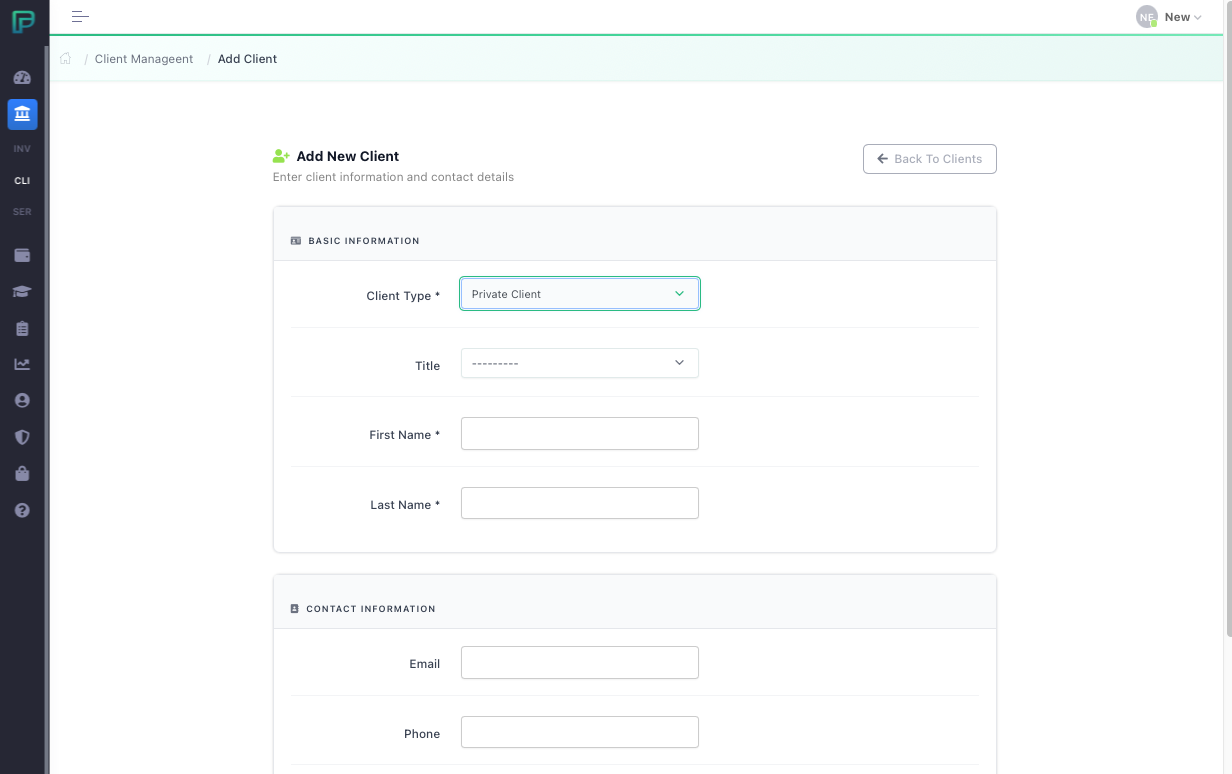
On this page you can add clients by clicking “Add Client” top right of the page. Click this button and input your client’s details on the page that appears. The “Notes” field is not for storing client notes. This field could be used for storing the client’s next of kin details in case of emergency, information in the notes box will not appear on the client’s invoice.
Once complete, click “Save” and the system will return you back to the client list. You may have noticed on the client details page there was a tick box at the bottom to delist the client, leave this un-ticked for now, but if at some point you do not wish to see this client appear in drop-down menus, for example if the client has completed their sessions with you, then you can tick this box to hide the client. It will not delete the client or any of the client invoices, using this feature allows you to go back to this client and un-tick the box to reveal them in the listings again. This is useful if you have a lot of clients that you no longer work with, it enables you to keep a tidy system, but if they come back you don’t need to re-enter all their data again. Obviously, there will come a time where you are required to delete the client data in accordance with GDPR, at this point you would delete the client instead of de-listing them.
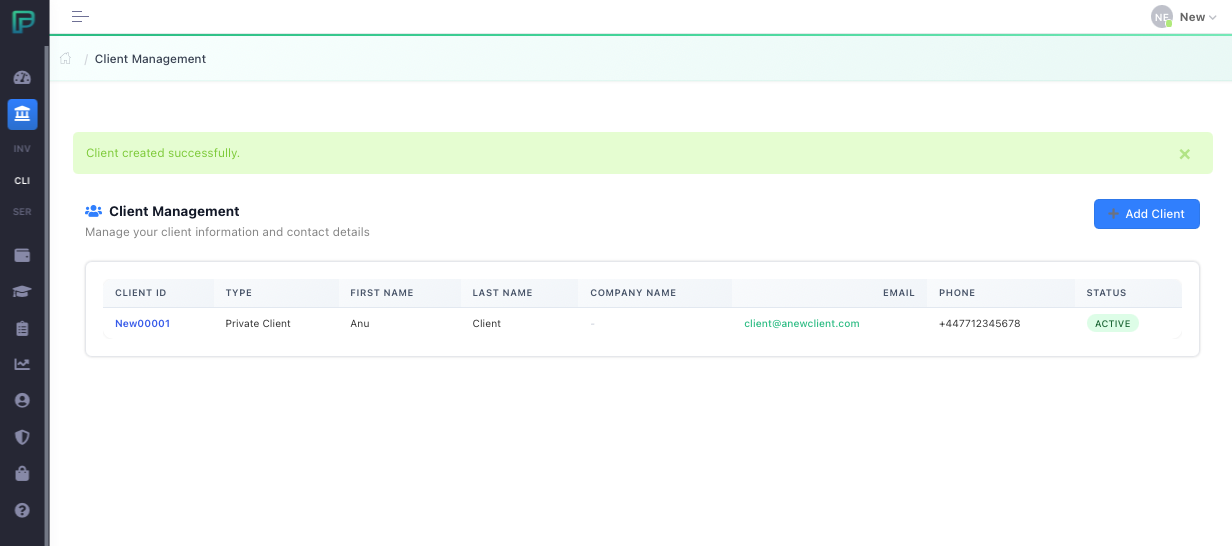
You can see a green banner has appeared at the top, notifying you of a saved change, our client has been allocated a client number of “New00001”, numbering is automatic. You might wish to use these numbers to reference hand-written client notes. At the time of writing, Psycounts doesn’t have a feature to store client notes, however, this could be introduced as an additional option at a later date if there is enough demand for it.
The system is configured in a way that maintains client and invoice numbering, therefore, if you add test records to your system they will be allocated live client and invoice numbers which you cannot delete. USE LIVE DATA TO SETUP YOUR SYSTEM, not test data. You can delete clients and invoices, but you can’t re-use the numbers of deleted records.
Invoice
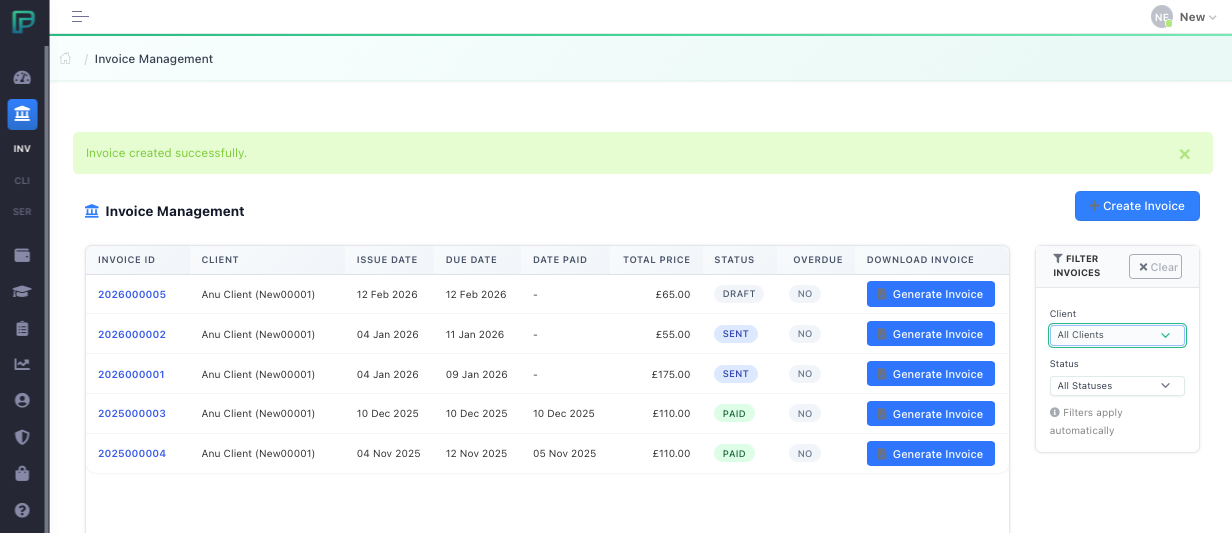
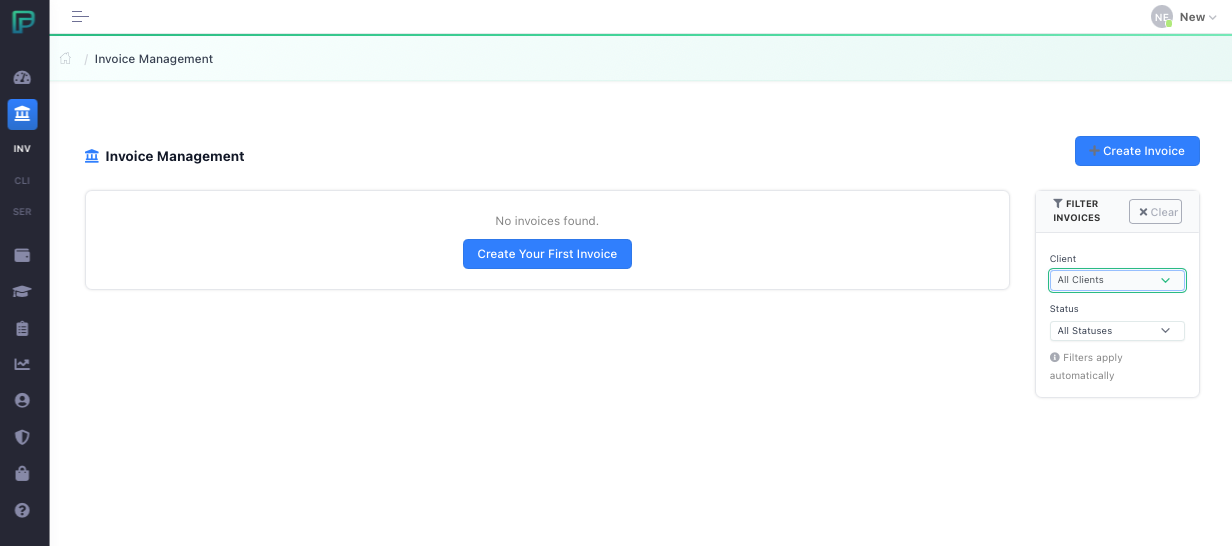
We are now ready to generate an invoice for a client. From the left-hand menu select “Income” and then “Invoice” from the sub menu. We are presented with the Invoice page; at the top right we have the option to “add invoice” and beneath this we have the filter box. We can filter content by client or by invoice status, this is a very useful tool if we need to track invoices later on. For now, let’s create a new invoice for one of our clients.
Click the “Add Invoice” button to create a new invoice. This page is split into 2 sections, the “Invoice Details” section followed by the “Invoice Items” section. Select the client, then either invoice or credit note (use credit note if you need to make a refund). The issue date and the due date can be changed if necessary, we can also mark the invoice paid and add the date it was paid if we wish to. Anything typed in the message box will appear on the invoice, this is useful if you are invoicing an organisation and need to provide reference numbers or additional information for them.
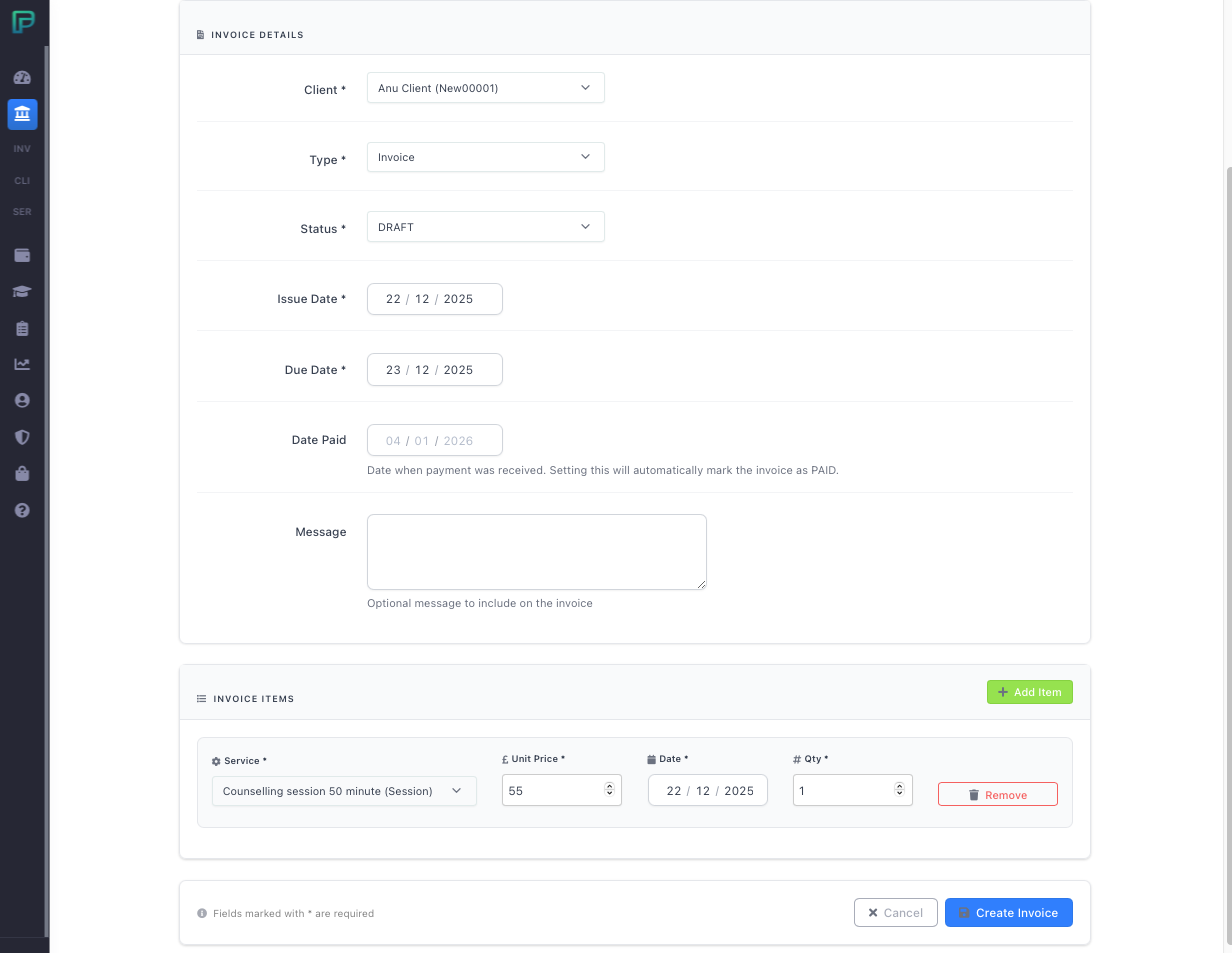
The second part of the invoice provides details of the services delivered. Use the drop-down menu in the first row to select the service, these options are taken from the list we created earlier on the services page. The unit price will show in £, select the date and quantity. You can add multiple entries to each invoice. For example, if you were having weekly sessions with a client and billed them on a monthly basis, you could add all sessions for that month with the respective dates, or you could add a single entry with the date of the last session, then change the quantity depending on how many sessions you wish to bill for. The message box above could then be used for listing the dates of the sessions.
You can prepare your invoices in advance by selecting “draft” as status, this status will change automatically once you download the invoice at a later stage. When you have entered all the information you need, select “Create Invoice” to be taken back to the list page.
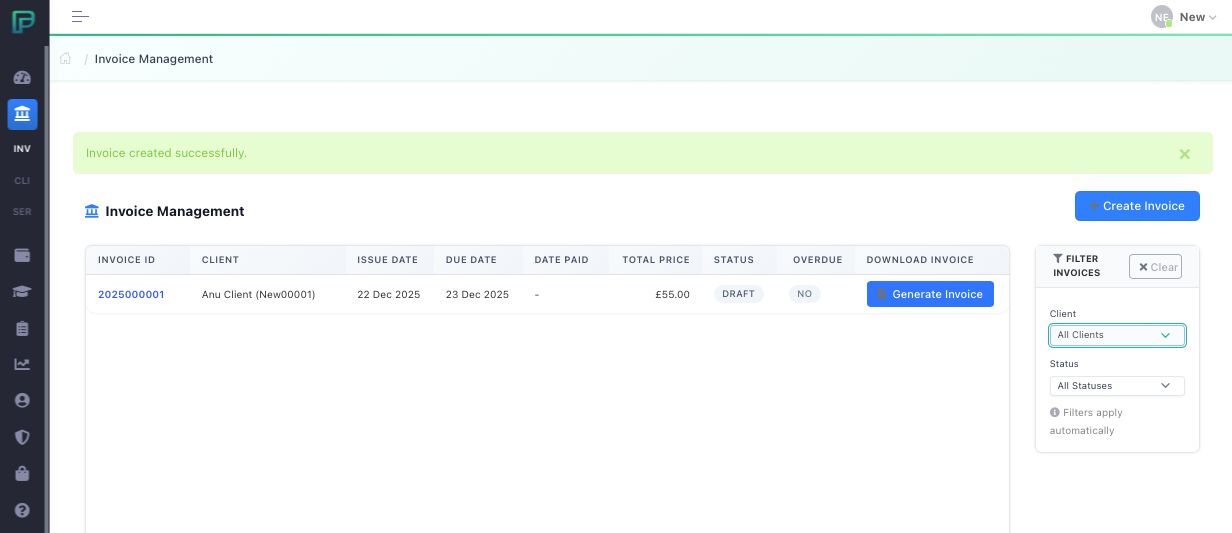
You should now see your draft invoice in the list, when you are ready to email this, or print to send to a client, simply click on the download invoice button. This will generate a PDF copy for you. At the same time, it will mark the invoice on your system as “sent” and generate a record in your client log.
If we go back to your invoice list page and click refresh, we can see the invoice is now marked as “Sent”. Once our client has made payment you can edit the invoice and mark it as “paid” then click the “Save” button to save your changes. Once an invoice is marked paid it will then reflect in your accounts, using the date of payment to distinguish which accounting year it is applied to.